How to Decarboxylate THCa: A Step-by-Step Process for Activation
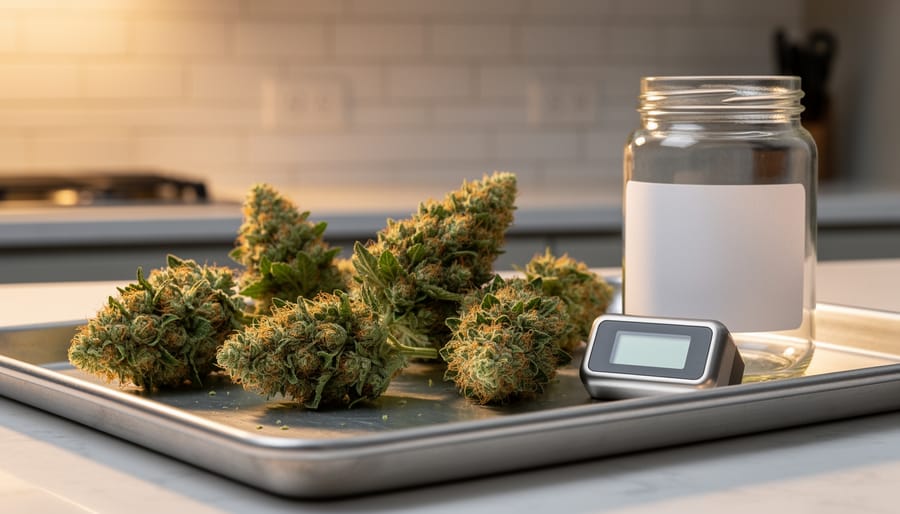
THCa decarboxylation converts non-psychoactive tetrahydrocannabinolic acid into active THC by applying controlled heat, typically at 220-240°F for 30-45 minutes. The process removes a carboxyl group from the THCa molecule, transforming raw cannabis into material that produces the psychoactive effects cannabis is known for. Whether you’re preparing flower for edibles, tinctures, or comparing it to options like the best THCA vape understanding decarboxylation gives you full control over potency and consistency.
Most raw cannabis contains minimal THC. The cannabinoids exist primarily as THCa until heat triggers the chemical conversion. Without proper decarboxylation, your edibles won’t deliver the expected effects, and you’ll waste both material and time.
The challenge isn’t whether to decarboxylate but how to do it reliably. Temperature too high and you’ll destroy cannabinoids. Too low and conversion remains incomplete. Time your process incorrectly and you’ll either leave THCa unconverted or degrade THC into less desirable compounds.
This guide walks you through the exact materials, temperatures, and timing required for successful decarboxylation. You’ll learn how to verify conversion, troubleshoot common problems, and avoid the mistakes that compromise potency. The method works for any quantity, requires only basic kitchen equipment, and takes less than an hour from start to finish. Master this process once, and you’ll have a repeatable system for activating cannabis effectively every time.
Understanding THCa and the Decarboxylation Process
THCa, or tetrahydrocannabinolic acid, is the raw, non-psychoactive compound found in fresh cannabis plants. Unlike its well-known counterpart THC (delta-9-tetrahydrocannabinol), THCa doesn’t produce intoxicating effects when consumed. This is why eating raw cannabis flower won’t get you high, the psychoactive component simply isn’t active yet.
The key difference lies in molecular structure. THCa contains an extra carboxyl group (COOH) attached to its molecular chain. This additional group prevents the compound from binding effectively to CB1 receptors in your brain, the interaction responsible for THC’s psychoactive effects. Think of it as a locked door, the carboxyl group blocks the molecule from fitting into the receptor sites that create the characteristic cannabis experience.
Cannabis plants naturally produce THCa as part of their growth cycle. The plant doesn’t create THC directly; instead, it synthesizes THCa as a defense mechanism and metabolic building block. In its raw state, fresh cannabis contains predominantly THCa with only trace amounts of THC. This is why lab results for flower often show separate percentages for THCa and THC, you’re seeing both the inactive precursor and any naturally converted active compound.
Decarboxylation is the chemical reaction that activates THCa by removing that carboxyl group. When you apply heat to cannabis, whether through smoking, vaping, or intentional heating in an oven, the thermal energy breaks the bond holding the COOH group. This molecular change transforms THCa into THC, fundamentally altering how the compound interacts with your body.
The process occurs naturally at specific temperature thresholds. Combustion (lighting cannabis on fire) causes instant decarboxylation, which is why smoking produces immediate effects. However, lower, controlled temperatures between 220-250°F trigger the same chemical reaction more slowly and evenly, preserving more of the compound and allowing precise conversion. This controlled approach is essential when preparing cannabis for edibles, tinctures, or topicals where you need activated THC without the combustion process.
What You’ll Need for Decarboxylation
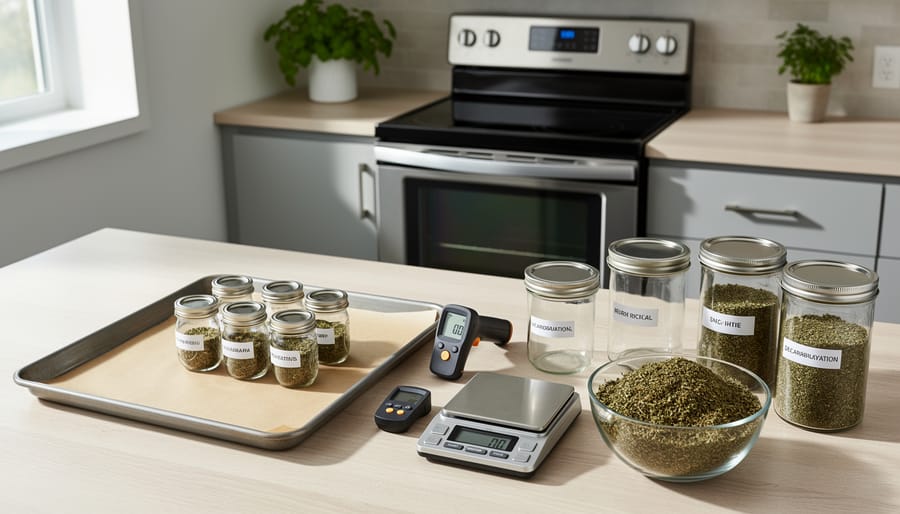
Successful decarboxylation requires the right tools and materials. You don’t need specialized lab equipment, but having the correct basics ensures consistent results every time.
Here’s what you need to gather before starting:
- Standard kitchen oven: Provides the controlled heat necessary for even decarboxylation; specialized devices work but aren’t required for most home use
- Oven thermometer: Verifies actual oven temperature since built-in displays often run 10-25°F off, which can ruin a batch
- Rimmed baking sheet: Holds your material flat and prevents spillage; aluminum or stainless steel both work well
- Parchment paper: Creates a non-stick surface and prevents material from burning or sticking to the pan
- Grinder or scissors: Breaks cannabis into consistent pieces for uniform heating without turning it into powder
- Airtight glass jar: Stores decarboxylated material while preserving potency and preventing moisture exposure
- Timer: Ensures you don’t exceed the optimal heating window and degrade THC into CBN
- Your cannabis material: Choose quality flower or trim with known THCa content for predictable results
The oven thermometer deserves special attention. Your oven’s built-in gauge measures air temperature, not the actual heat your material experiences. A dedicated thermometer placed on the same rack as your baking sheet gives you the accurate reading you need to stay within the narrow 220-250°F window.
Quality parchment paper matters more than most people realize. It prevents direct contact between your material and the hot metal surface, which can create hotspots that burn portions of your batch while leaving other parts undercooked. Skip wax paper or aluminum foil, both of which can stick or transfer unwanted substances at decarboxylation temperatures.
Safety Precautions and Important Warnings
Before starting any decarboxylation process, set up your workspace in a well-ventilated area. Open windows, turn on exhaust fans, or use a kitchen ventilation system, the heating cannabis releases a strong, distinctive odor that can permeate your home and alert neighbors. If discretion matters, consider using odor-absorbing products or working when your space is most private.
Verify the legal status of cannabis and THC in your jurisdiction before proceeding. Laws vary dramatically by location, and what’s legal in one state or country may carry serious penalties elsewhere. Confirm that you’re legally permitted to possess, process, and activate cannabis material where you live.
Use an oven thermometer to validate your oven’s actual temperature. Built-in oven displays are often inaccurate by 25°F or more, and that margin can mean the difference between successful activation and wasted material. Proper temperature control is non-negotiable for this process.
Clear your workspace of flammable materials including paper towels, dish cloths, and plastic containers. Keep a fire extinguisher accessible and know how to use it. When removing hot trays from the oven, use proper oven mitts and place them on heat-resistant surfaces, never directly on countertops that could burn or melt.
Handle heated cannabis material with caution. It retains heat longer than you’d expect and can cause burns if touched immediately after removal. Let it cool completely before transferring to storage containers, and keep children and pets away from your workspace throughout the entire process.
Step-by-Step Decarboxylation Process
Preparing Your Cannabis Material
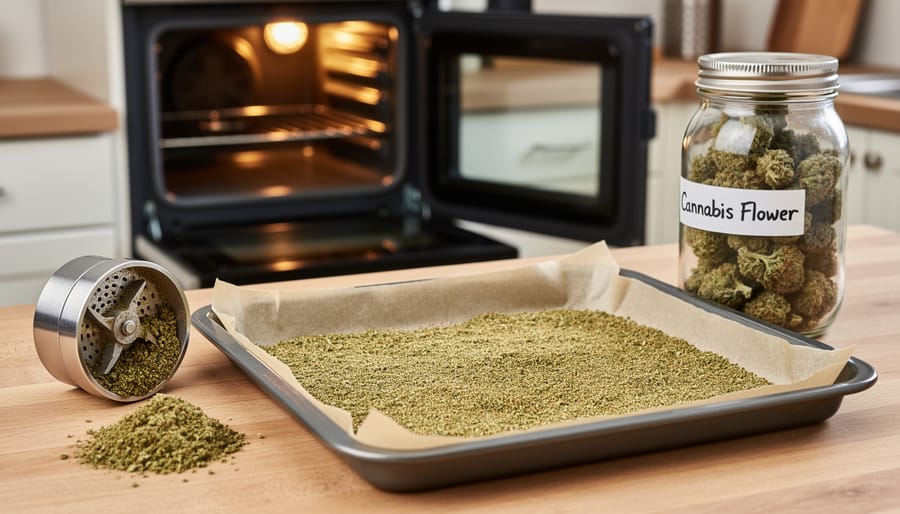
Begin by breaking down your cannabis material to ensure consistent heat exposure throughout the decarboxylation process. Use a grinder to achieve a coarse, even consistency, similar to dried oregano rather than fine powder. Finely ground material can burn or cook unevenly, while larger chunks may leave pockets of unconverted THCa.
For most home decarboxylation, start with 3.5 to 7 grams of material. This quantity allows room for spreading without overcrowding, which is critical for uniform heating. If processing larger amounts, work in separate batches rather than piling material onto a single sheet.
Line your baking sheet with parchment paper to prevent sticking and simplify cleanup. Spread the ground cannabis in a single, even layer across the sheet, no more than a quarter-inch thick. Avoid clumping or overlapping, as these create hot spots and cold zones that lead to partial conversion.
Leave space around the edges of the sheet where heat may be more intense. The goal is maximum surface area exposure with minimal material depth, allowing heat to penetrate every particle uniformly during the decarboxylation window.
Temperature and Timing Guidelines
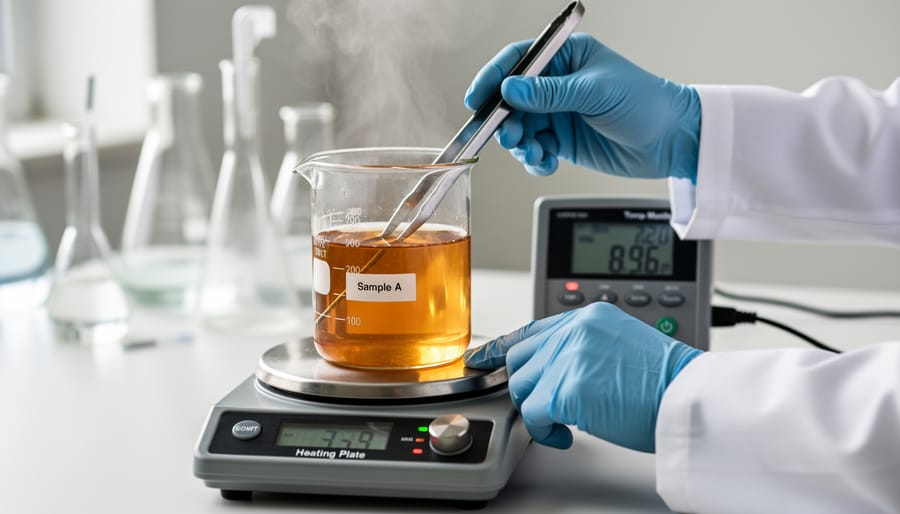
The ideal decarboxylation temperature range sits between 220°F and 250°F, with 240°F representing the sweet spot for most situations. This range is hot enough to trigger the chemical conversion without degrading THC into less desirable compounds. Stay below 300°F, higher temperatures risk combustion and terpene loss.
For standard decarboxylation, set your oven to 240°F and bake for 30-40 minutes. Finely ground material may finish closer to 30 minutes, while larger pieces need the full 40 minutes or slightly longer. Moist or fresh-frozen material requires an extra 5-10 minutes since residual moisture must evaporate before effective decarboxylation begins.
Quantity matters less than you’d expect. A quarter-ounce and a full ounce decarb at roughly the same rate when spread evenly, though larger batches benefit from a gentle stir halfway through to ensure uniform heat exposure.
Monitor progress by checking color. The material should shift from bright green toward golden-brown or light tan. If it’s still green after 40 minutes at 240°F, add five-minute increments until the color changes. If it turns dark brown or smells burnt, you’ve gone too far.
Use an oven thermometer to verify your actual oven temperature, many run 10-25 degrees off their dial setting. This single step prevents most timing problems. Check the material at 30 minutes, then assess whether it needs more time based on color and aroma rather than blindly following a clock.
Cooling and Storage
Once your cannabis reaches the target color and aroma, remove the baking sheet from the oven immediately. Let the material cool completely on the sheet, this typically takes 20-30 minutes at room temperature. Don’t rush this step by refrigerating or moving the hot material, as sudden temperature changes can affect the final product’s consistency.
The cooling period allows residual heat to finish the conversion process gently without overcooking. You’ll notice the material becomes brittle and crumbly as it cools, which indicates proper decarboxylation.
After cooling, transfer your activated cannabis to an airtight container. Glass jars with rubber seals work best because they don’t absorb odors and protect against moisture and light exposure. Avoid plastic bags or containers, which can degrade the cannabinoids over time.
Store your decarboxylated cannabis in a cool, dark place like a cupboard or drawer. Properly stored material maintains potency for 3-6 months, though it’s best used within three months for optimal results. Label the container with the date and strain to track freshness.
Keep the container away from direct sunlight, heat sources, and humidity. If you live in a humid climate, consider adding a small humidity control packet to prevent moisture absorption, which can reduce shelf life and encourage mold growth.
How to Verify Successful Decarboxylation
Confirming that your cannabis has decarboxylated properly prevents wasted material and disappointing results. Your senses provide reliable first indicators before any lab test.
Properly decarboxylated material displays several consistent characteristics:
- Color shifts from bright green to golden-brown or light tan, with even distribution across all material
- Texture becomes noticeably drier and more brittle, crumbling easily between fingers
- Aroma intensifies and changes from grassy or hay-like to a deeper, toasted scent with pronounced cannabis notes
- Surface appears uniform without dark spots (which indicate burning) or bright green patches (which signal incomplete conversion)
Undercooked material retains its original bright green color and pliable texture, bending rather than crumbling. The smell stays mild and vegetal. Overcooked material turns dark brown or black with burnt edges, produces harsh smoke-like odors during processing, and loses potency as THC degrades into CBN.
For precision verification, home testing kits measure cannabinoid ratios, showing THC levels above 90% of the original THCa content in successful batches. These strips or liquid reagent tests cost $20-40 and provide results within minutes. Lab testing through certified facilities offers exact percentages but takes longer and costs more.
Most home processors rely on the combined visual-tactile-aromatic assessment. After cooling, transfer your decarbed material to safe storage immediately to preserve potency. If indicators suggest incomplete conversion, return the material to heat for five-minute intervals, checking between each extension until proper color and texture appear.
Common Mistakes and Troubleshooting
Most decarboxylation failures stem from four preventable mistakes. Temperature errors top the list, ovens often run 10-25°F hotter or cooler than the dial indicates, which means your material either combusts at 300°F+ or barely converts below 200°F. Always verify actual oven temperature with a separate thermometer placed on the same rack as your cannabis. If your material turns dark brown or black with a burnt smell, you overheated it. Lower the temperature by 15-20°F and reduce time by 5-10 minutes on your next attempt.
Timing mistakes produce similarly disappointing results. Pulling material too early leaves substantial THCa unconverted, you’ll notice it stays bright green with minimal color change. Add 5-10 minutes and check again. Conversely, leaving it too long degrades THC into CBN, creating sedative effects you might not want. Watch for the shift from green to golden-brown, not dark brown.
Uneven heating wastes portions of your batch. Thick piles in the pan center prevent consistent heat penetration while edges overcook. Spread material in a single, thin layer and rotate the pan halfway through. Grind to uniform consistency, chunks decarb at different rates than fine powder.
Material preparation sets up many problems before heating begins. Wet or uncured cannabis requires extra time and lower temperatures to avoid steam pockets that create hot spots. Dry your material properly first, or extend decarb time by 10-15 minutes at 220°F instead of rushing at higher heat.
For step-by-step troubleshooting when results disappoint, examine your material’s appearance and smell against expected outcomes. Adjust one variable at a time, temperature, duration, or material preparation, rather than changing everything simultaneously, which makes it impossible to identify what actually works.
What to Do After Decarboxylation
Once your material has cooled to room temperature after the decarboxylation process, you can immediately incorporate it into recipes or infusions. The activated THC is now ready for use in cannabutter, oils, tinctures, or directly mixed into foods like smoothies or baked goods. If you plan to make edibles, finely grind the decarboxylated material to ensure even distribution throughout your mixture, this helps with consistent dosing across portions.
Before proceeding, run through a verification checklist to confirm proper activation. Start with conservative doses, especially if you’re new to homemade edibles; effects can take one to two hours to manifest and typically last four to six hours. A common beginner dose ranges from 2.5 to 5 mg of THC, though individual tolerance varies significantly.
For storage, transfer cooled material into an airtight glass container, mason jars work well, and keep it in a cool, dark place away from direct sunlight and heat sources. Properly stored decarboxylated cannabis maintains potency for three to six months, though gradual degradation begins immediately. Label containers with the date and strain to track freshness. If you’re not using the material within a week, consider vacuum-sealing portions or storing them in the freezer to extend shelf life up to a year. Avoid plastic bags for long-term storage, as they allow oxygen exposure that accelerates THC breakdown into less potent compounds.
Frequently Asked Questions
Do I need to decarboxylate THCa for all uses?
No. If you’re smoking or vaping, the heat from combustion or vaporization decarboxylates THCa instantly. You only need to pre-decarb for edibles, tinctures, topicals, or any preparation where the material won’t reach activation temperature during use.
Can I decarboxylate without an oven?
Yes. A sous vide setup offers precise temperature control by sealing cannabis in a vacuum bag and immersing it in water at 203°F for 90 minutes. Some specialized decarboxylation devices also provide controlled heating without an oven.
Is it possible to over-decarboxylate?
Absolutely. Excessive heat or prolonged exposure degrades THC into CBN, a less psychoactive compound, resulting in weaker effects and sedative properties. Once material turns dark brown or smells burnt, you’ve gone too far.
How long does decarboxylated material stay potent?
Properly stored in an airtight container away from light and heat, decarbed cannabis maintains potency for six months to a year. Potency gradually decreases over time as THC oxidizes into CBN.
Managing odor during decarboxylation remains a top concern. The process releases a strong, distinctive smell that can spread throughout your home. Running an exhaust fan, opening windows, using an air purifier with activated carbon filters, and choosing times when odor is less problematic all help. Some people place their covered baking sheet inside a turkey roasting bag to contain smell, though this requires careful monitoring to prevent overheating.
Starting with small test batches helps you avoid common mistakes and dial in your specific setup before processing larger quantities. Every oven heats slightly differently, and material moisture content varies, so your first few attempts establish your personal baseline for temperature and timing. Once you’ve confirmed successful decarboxylation through visual and aromatic cues, you can scale up with confidence.
Decarboxylating THCa isn’t complicated, but precision matters. You’ve learned that controlling temperature, keeping it between 220-250°F, and monitoring time carefully are the two factors that determine whether you activate THC effectively or waste your material. Miss by too much in either direction and you’ll end up with underwhelming results.
Start small. Your first batch should be a test run, not your entire supply. A few grams lets you dial in your oven’s actual temperature, understand how your material responds, and build confidence without risking waste. Once you’ve verified successful decarboxylation through color change and aroma, you can scale up.
The beauty of this process is its repeatability. Follow the same steps with the same equipment, and you’ll get consistent activation every time. Temperature control beats guesswork, proper timing beats rushing, and verification beats assumptions.
Before you use your decarboxylated material in edibles, tinctures, or topicals, confirm it’s properly activated. That golden-brown color and toasted aroma signal you’re ready for the next step. Take your time with the process, respect the chemistry, and you’ll maximize both potency and usability.
Leave a Reply