How to Connect Zapier Lead Connector to Your CRM for Live Stream Lead Capture
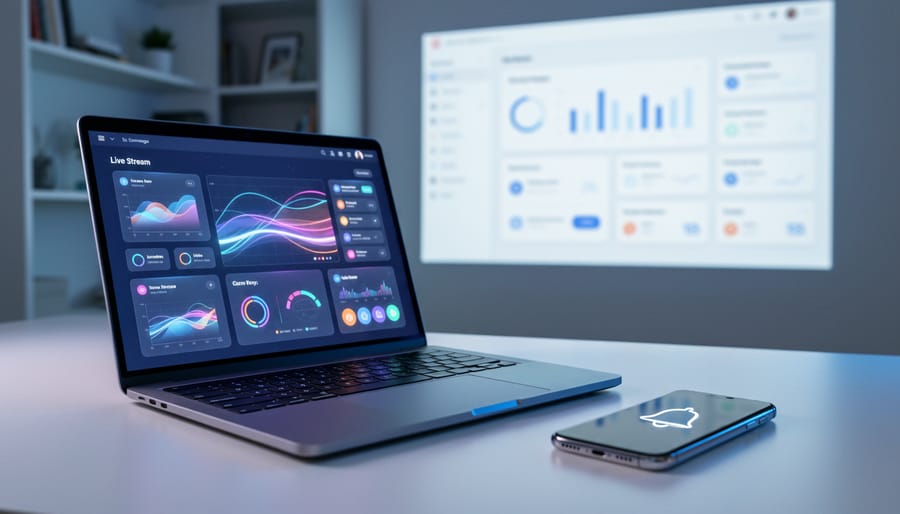
Connecting live stream leads to your CRM through Zapier takes about 15 minutes to set up and runs automatically once configured. The process links your streaming platform directly to your lead management system, eliminating manual data entry and ensuring every viewer who expresses interest gets captured and followed up with immediately.
Live streaming has become a critical channel for lead generation, but most businesses stop losing leads the moment the stream ends. Contact information scattered across chat windows, registration forms, and comment sections rarely makes it into your CRM where your sales team can act on it. The gap between capturing attention during a live event and following up afterward costs businesses thousands of dollars in lost opportunities.
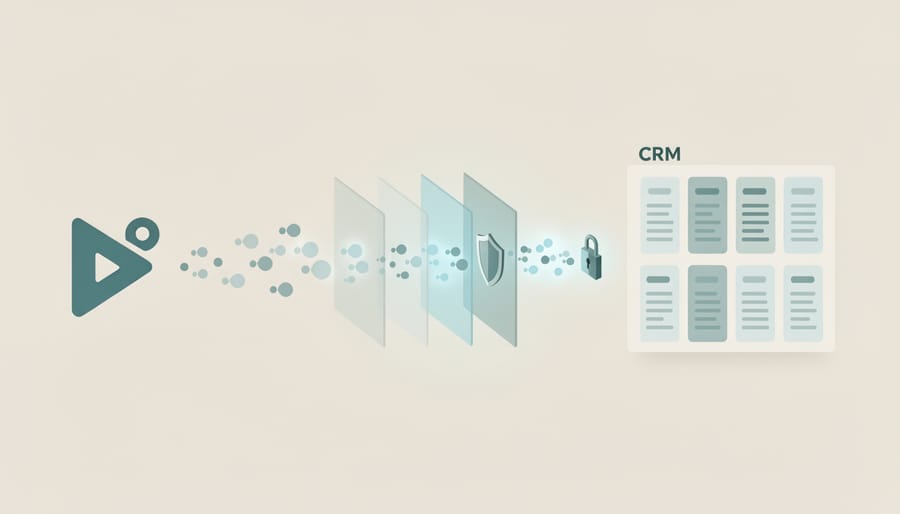
Zapier’s lead connector solves this problem by creating automated workflows between your streaming platform and CRM. When a viewer registers for your webinar, asks a question in chat, or fills out a lead form during your broadcast, that information flows directly into your sales pipeline without anyone lifting a finger. Your team can focus on delivering value during the stream while the automation handles the administrative work. This guide walks you through the complete setup process, from choosing the right trigger events to testing your workflow and troubleshooting common issues.
What You’ll Need Before You Start
Before you connect Zapier to your CRM for live stream lead capture, gather these essential components. Missing even one item will stall the setup process, so verify everything is ready beforehand.
- Active Zapier account (free tier works, but paid plans unlock multi-step workflows)
- CRM system access with administrator or API permissions enabled
- Live streaming platform account (YouTube Live, Facebook Live, LinkedIn Live, or similar)
- API keys or authorization credentials for both your CRM and streaming platform
- Documentation for your CRM’s API field names and data requirements
Your Zapier account serves as the automation hub that connects your streaming platform to your CRM. Without proper API permissions in your CRM, Zapier cannot create or update lead records, rendering the integration useless. Most CRM platforms require administrator-level access to generate API keys or enable third-party integrations, so check with your IT team if you lack these permissions.
The streaming platform credentials allow Zapier to detect trigger events, such as new form submissions or lead captures during your broadcast. Different platforms handle lead data differently. YouTube Live captures leads through cards and end screens, while Facebook Live relies on instant forms. Know which lead capture method your platform uses before starting the integration.
Keep your API keys secure and accessible. You’ll need to paste them into Zapier during setup. If your CRM uses OAuth authentication instead of API keys, have your login credentials ready. Some systems, like Salesforce, require both a password and a security token for API connections.
Important Considerations and Safety Checks
Before connecting live streaming platforms to your integrated CRMs you need to address data privacy and compliance requirements. Any automation that moves customer information between systems must comply with regulations like GDPR and CCPA, which require explicit consent before collecting and storing personal data.
Start by reviewing your CRM’s API permissions carefully. Many platforms default to broad access levels that grant far more control than necessary for a simple lead transfer. Limit permissions to only what the integration requires: typically creating or updating contact records and adding leads to specific lists or pipelines. Remove any permissions related to deleting records, accessing payment information, or modifying user settings.
Verify your live stream platform captures proper consent before sending data to Zapier. Check that your lead capture forms include clear opt-in language explaining how you’ll use the information and that this consent status transfers through to your CRM. Most privacy regulations require you to process personal data lawfully with documented consent.
Set up a test environment before going live. Create a separate Zapier account or use test mode if your CRM offers it. Run dummy data through the complete workflow to confirm fields map correctly, consent indicators transfer properly, and no unauthorized data gets captured. Document exactly what information flows through the integration and where it’s stored. This preparation prevents compliance issues and protects your business from potential data breaches or regulatory penalties once you activate the automation for real leads.
Step-by-Step: Setting Up Zapier Lead Connector
Step 1: Connect Your Live Streaming Platform to Zapier
Log into your Zapier account and click the “Create Zap” button in the top left corner. You’ll land on the workflow builder where you need to select your live streaming platform as the trigger app.
In the search box, type the name of your streaming platform. Zapier supports direct integrations with YouTube Live, Facebook Lead Ads, LinkedIn Lead Gen Forms, and Restream. If your platform isn’t listed directly, you can often connect through webhook triggers or intermediate services like Typeform or Google Forms that capture lead data during your stream.
Select your platform from the results, then choose your Zapier account or create a new connection. Click “Sign in” and you’ll be redirected to your streaming platform’s authorization page. Grant Zapier the necessary permissions to access your account data. These permissions typically include reading lead form submissions, accessing viewer information, and monitoring live stream events.
Once authorized, you’ll return to Zapier where you need to select your trigger event. This is the specific action that will start your workflow. For Facebook Lead Ads, choose “New Lead.” For YouTube Live, you might select “New Live Chat Message” or connect through a form tool if you’re using on-screen lead capture forms. LinkedIn Lead Gen Forms offers “New Lead Form Response.”
Click “Continue” and Zapier will test the connection. If your streaming platform hasn’t generated any recent trigger events, you may need to create test data or proceed without testing for now.

Step 2: Configure the Lead Capture Trigger
Once you’ve connected your live streaming platform, the next critical step is defining exactly when Zapier should capture a lead. This ensures you’re only collecting relevant data and not flooding your CRM with unnecessary entries.
In your Zapier dashboard, locate the trigger setup panel for your connected platform. You’ll see a dropdown menu listing available trigger events. For most live streaming platforms, you’ll choose options like “New Form Submission,” “New Lead Captured,” or “Contact Information Submitted.” Select the event that matches how you’re collecting viewer information during your streams.
After selecting your trigger, configure the specific conditions. If your platform offers multiple forms or lead capture points, specify which one should activate the Zap. For example, you might only want leads from a specific registration form rather than every comment or interaction.
Set up any filters at this stage to exclude test submissions or internal team entries. Many platforms let you add conditional filters based on email domain, submission source, or other identifiers.
Test the trigger by submitting sample data through your live stream form. Zapier will show you the captured information, allowing you to verify the trigger fires correctly before proceeding to data mapping.
Step 3: Map Lead Data Fields
After selecting your CRM action, Zapier displays the data fields your CRM expects to receive. This mapping step determines which information flows from your live stream platform into each CRM field.
Start by matching the most critical fields: name, email address, and phone number. Click into each CRM field box in Zapier, then select the corresponding data from your streaming platform’s output. For example, if your live stream form collects “Attendee Email,” map that to your CRM’s “Email” or “Contact Email” field. The exact field names vary by platform, but Zapier shows you all available data from the previous trigger step.
For company information, job title, or other business details, follow the same process. If your streaming platform doesn’t collect a specific field that your CRM requires, you have three options: leave it blank (if the field is optional), insert a default value like “Live Stream Lead” to identify the source, or use Zapier’s Formatter tool to create a value based on other data.
Custom fields require special attention. Most CRMs label custom fields with unique identifiers or internal names rather than display names. Check your CRM’s field settings to confirm you’re mapping to the correct custom field, especially for dropdown selections or date formats that must match exactly.
For fields with inconsistent data, like phone numbers with varying formats, consider adding a Formatter step before the CRM action to standardize the information. This prevents errors when leads transfer into your system.

Step 4: Connect Your CRM as the Action Destination
With your trigger configured and data fields mapped, you’re ready to connect your CRM as the destination for your captured leads. In the Zap editor, click the plus icon below your trigger to add an action step. Search for your CRM by name, Zapier supports HubSpot, Salesforce, Zoho CRM, Pipedrive, and dozens of other platforms.
Select your CRM from the results, then choose the specific action you want to perform. The most common options are “Create Contact,” “Create Lead,” or “Update Contact/Lead.” Choose “Create Contact” if you’re capturing new leads, or “Update” if you want to enrich existing records with live stream engagement data.
Click “Sign in” to authorize the connection between Zapier and your CRM. You’ll be redirected to your CRM’s login page to grant permissions. Make sure you’re logged in with an account that has API access and permission to create or modify contacts.
Once authorized, you may need to select additional details like which pipeline to add leads to, what stage to assign them, or which user should own the contact. These options vary by CRM but typically appear as dropdown menus in the action setup screen.
Step 5: Set Up Automated Follow-Up Actions
After a lead flows from your live stream into your CRM, Zapier can trigger immediate follow-up actions that would otherwise require manual work. Configure these automated steps to ensure no lead goes cold while you’re focused on delivering your stream.
Start by adding another action step in your Zap. Click the plus icon below your CRM action and search for your email marketing platform (Mailchimp, ActiveCampaign, or your CRM’s native email tool). Select “Add Subscriber to List” or “Send Email” as the action. Map the lead’s email address from the previous step and choose your welcome or confirmation email template. This ensures prospects receive acknowledgment within minutes of signing up during your stream.
Next, set up lead assignment rules. Add a filter that checks the lead source field or tags, then route high-value leads to specific sales reps based on territory, product interest, or company size. Use conditional paths (available on Zapier’s Professional plan) to create different workflows for different lead types.
Finally, apply tags automatically based on which live stream event captured the lead. This segments your audience for targeted nurture sequences without requiring your team to manually categorize hundreds of contacts after each broadcast.
Testing and Verifying Your Integration
Before going live with your Zapier integration, thorough testing prevents data loss and ensures your real-time data flows correctly into your CRM. Start by running a test directly in the Zapier editor, click “Test trigger” to pull sample data from your live streaming platform. This shows whether Zapier can access your lead information and displays exactly what fields are available.
Next, send test data through the complete workflow using this verification checklist:
- Create a test lead by filling out your live stream form with recognizable dummy data (use “Test Lead” as the name and a unique email address you control).
- Monitor the Zap history in your Zapier dashboard to confirm the workflow triggered and completed without errors.
- Check your CRM within 1-2 minutes to verify the test lead appears with all mapped fields populated correctly.
- Compare the data in your CRM against the original test submission to catch any missing or incorrectly mapped information.
- Verify that any automated follow-up actions (emails, tags, assignments) executed as configured.
Success at each checkpoint means the field contains the exact value you entered, appears in the correct CRM property, and triggers associated automations. If data appears blank or misplaced, return to your field mapping settings and adjust the connections between your source and destination fields.
Run at least three test submissions with varying data types, include optional fields left empty, special characters in names, and international phone formats, to expose edge cases before real leads flow through. Check the Zap history for any warning messages or failed steps, which indicate configuration issues that need fixing. Once all tests pass cleanly and leads appear instantly in your CRM with complete, accurate information, you’re ready to activate the integration for live traffic.
Optimizing Your Lead Capture Workflow
Once your Zapier Lead Connector workflow is running smoothly, fine-tune it to maximize efficiency and lead quality. Start by adding filters to your Zap that check for duplicate email addresses before creating new CRM contacts, this prevents the same lead from being added multiple times if they attend multiple streams or fill out forms repeatedly. Set up conditional logic paths that route different lead types to appropriate pipelines: for example, enterprise-level prospects could trigger immediate sales team notifications, while individual subscribers enter a nurture sequence.
Implement simple lead scoring by assigning point values based on engagement signals captured during the stream: attendees who asked questions might receive higher scores than passive viewers, helping your sales team prioritize follow-up. Monitor your integration’s performance weekly through Zapier’s task history dashboard, checking for failed runs, error patterns, or sudden drops in lead volume that might indicate connection issues. Add time delays between trigger and action if your CRM occasionally fails to receive data due to API rate limits during high-traffic streams. Consider creating separate Zaps for different streaming platforms or event types, giving you granular control over how each lead source is processed and tagged in your system.
Common Issues and How to Fix Them
Even well-configured integrations can hit snags. Connection failures typically occur when API credentials expire or permissions change. Check your Zapier dashboard for authentication errors and reauthorize both your streaming platform and CRM connections. If you notice missing data fields, verify that your field mapping matches exactly between source and destination, some platforms use different labels for the same information like “company name” versus “organization.”
Why are leads appearing twice in my CRM?
Duplicate entries usually happen when the same lead triggers the Zap multiple times during a stream. Add a filter in Zapier to check for existing records before creating new contacts, or configure your CRM to deduplicate based on email address.
What causes delayed lead transfers?
Delays of 5-15 minutes are normal on free Zapier plans, which check for new data every 15 minutes. Upgrade to a paid plan for faster polling intervals, or check if your streaming platform’s API is experiencing slowdowns.
How do I fix API limit errors?
API limits occur when you exceed the number of allowed requests per hour. Reduce the frequency of your Zaps, batch lead transfers instead of processing one at a time, or contact your CRM provider to increase your API allocation.
Why won’t my Zap turn on?
Zapier requires all required fields to be mapped before activation. Review each step for red warning indicators, fill in any mandatory fields, and test the workflow before toggling it on.
For live stream shopping events with high traffic, rate limiting becomes more critical. Configure your Zap to handle bursts of leads by spacing out CRM updates or implementing a queue system. When errors persist, check Zapier’s task history to identify the exact failure point. Most issues resolve by refreshing connections, updating field mappings, or adjusting filter conditions to match your current workflow requirements.
Automating your live stream lead capture with Zapier Lead Connector eliminates the manual work of transferring contact information from your broadcasts to your CRM. What used to take hours of copying and pasting now happens instantly in the background, giving you more time to focus on what matters: following up with prospects while they’re still engaged.
The integration you’ve built doesn’t just save time. It ensures every lead gets captured accurately and enters your follow-up workflow immediately, which dramatically improves response rates. When leads receive confirmation emails within minutes instead of days, you maintain momentum and demonstrate professionalism.
Start with a basic integration connecting your streaming platform to your CRM. Once it’s running smoothly, you can layer in conditional logic, lead scoring, and automated nurture sequences. This foundational automation becomes a building block for broader marketing workflows that handle everything from initial capture through conversion.
The key is taking that first step. Set up a simple Zap, test it thoroughly, and watch how it transforms your lead management process. You’ll quickly wonder how you ever managed live stream leads manually.
Leave a Reply